
Every farmer knows that water is the lifeblood of a successful harvest. However, simply having a water source isn’t enough; how you distribute that water across your fields determines your yield, crop health, and monthly expenses. Laying down a new irrigation pipe line can feel like an overwhelming task. If it is done incorrectly, you run the risk of dealing with constant leaks, pressure drops, uneven water distribution, and expensive field repairs in the middle of the peak growing season.
Proper installation ensures that your fields receive uniform moisture while protecting your pocketbook from wasted water and premature equipment failure. At Vishal Pipe, we believe that smart farming begins with strong foundations.
Whether you are looking for a reliable sprinkler irrigation pipe dealer in indore or setting up a localized drip line, this comprehensive, step-by-step guide will walk you through installing your irrigation pipe infrastructure the right way.
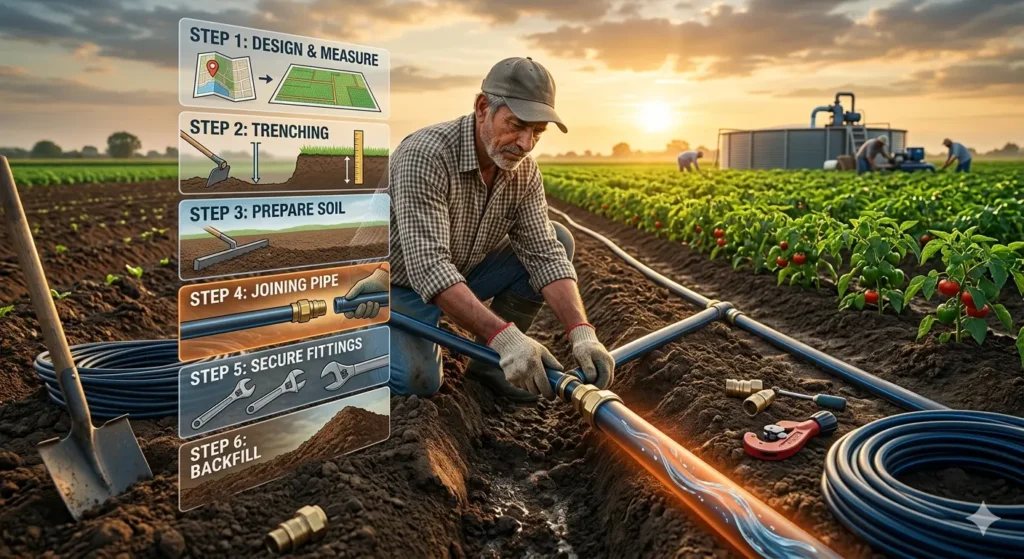
1. Step 1: Design and Route Planning
Before digging a single trench or purchasing materials, you must map out your entire layout.
- Measure Water Flow and Pressure: Check your source’s water pressure to determine how many lines or sprinkler heads your system can run simultaneously.
- Map the Topography: Water flowing uphill loses pressure. Map out your lines to leverage natural elevation or account for friction loss over long distances.
- Locate Existing Utilities: Always mark out pre-existing underground power lines, old pipelines, or roots before breaking ground.
2. Step 2: Choosing the Right Materials
The performance of your agricultural system is heavily dependent on selecting the correct material variant for the job. High-Density Polyethylene (HDPE) and PVC remain the gold standards for modern farming.
- For Sprinkler & Drip Systems: HDPE is highly flexible, UV-stabilized, and handles rough outdoor terrain effortlessly. If you are scaling up, working with an authorized sprinkler system dealer in indore ensures you get matched with pressure-rated piping built to last.
- For Fixed Mainlines: Rigid PVC or specialized plastic variants are ideal for buried trenches handling consistent structural water flow.
3. Step 3: Trenching and Ground Preparation
For a permanent underground irrigation pipe setup, correct trenching protects your lines from heavy tractors, shifting soil, and frost.
Trench Depth Guidelines
- Mainlines: Dig to a depth of at least 18 to 24 inches to safeguard the lines against heavy machinery driving overhead.
- Lateral Lines: A depth of 12 to 18 inches is typically sufficient for branch lines feeding individual sprinkler zones.
Make sure the bottom of the trench is flat, smooth, and cleared of sharp rocks or debris that could puncture or pinch the plastic surface under pressure.
4. Step 4: Joining and Laying the Pipes
How you connect your pipeline determines whether your system remains leak-free for five months or fifteen years.
- For HDPE Piping: These lines are typically joined using quick-connect compression fittings, or thermal butt fusion for long, seamless hauls. Ensure all components are wiped completely clean of dirt or sand before joining them.
- For PVC Piping: Cut your pieces square, deburr the edges, apply a uniform layer of primer, and immediately follow with high-grade solvent cement. Hold the joint firmly for 30 seconds to allow a secure bond to fuse.
- Snaking the Line: Never stretch a plastic pipeline tight inside a trench. Lay it down with a slight “snake” or wiggle. This extra slack allows the pipe material to expand and contract smoothly as temperatures change between day and night.
Quick Reference: Regional Sourcing Guide for Farmers
| What You Need | Where to Look / Best Local Matches |
| High-Efficiency Sprinkler Systems | Connect with a certified sprinkler irrigation pipe dealer in indore or an established sprinkler system dealer in indore. |
| Bulk HDPE & Agricultural Mains | Locate verified inventory by searching for sprinkler pipe dealers near me. |
| PVC, CPVC & Heavy Utility Lines | Buy directly from a specialized plastic pipe dealer in indore. |
| Auxiliary & Home Plot Watering | Check inventory at a trusted garden pipe dealer near me. |
5. Step 5: Flushing and Pressure Testing
Never bury your lines immediately after connecting them! Doing so is a recipe for digging them right back up later.
- Flush the System: Leave the very ends of your lateral lines open and run water through the network. This flushes out any dirt, PVC shavings, or debris that slipped inside during assembly, keeping your sprinkler nozzles from clogging.
- Cap and Pressurize: Cap off the ends and bring the system up to normal operational pressure.
- Inspect Every Joint: Walk along the exposed open trenches and closely inspect each connection point for leaks, weeping joints, or drops in pressure.
6. Step 6: Backfilling Safely
Once you are 100% certain your line is completely watertight, it is time to close the trench.
- The Initial Layer: Shovel a 3-to-4-inch layer of clean, rock-free soil or sand directly over the pipeline. This acts as a protective cushion.
- The Final Fill: Fill the remainder of the trench with your regular field soil. Compact it down in gradual stages to prevent the ground from sagging significantly after the next heavy rainfall or watering cycle.
The Vishal Pipe Promise: A great irrigation setup is only as good as the raw materials behind it. When you invest your time into a proper installation using high-quality components, you save hours of maintenance labor down the line.
